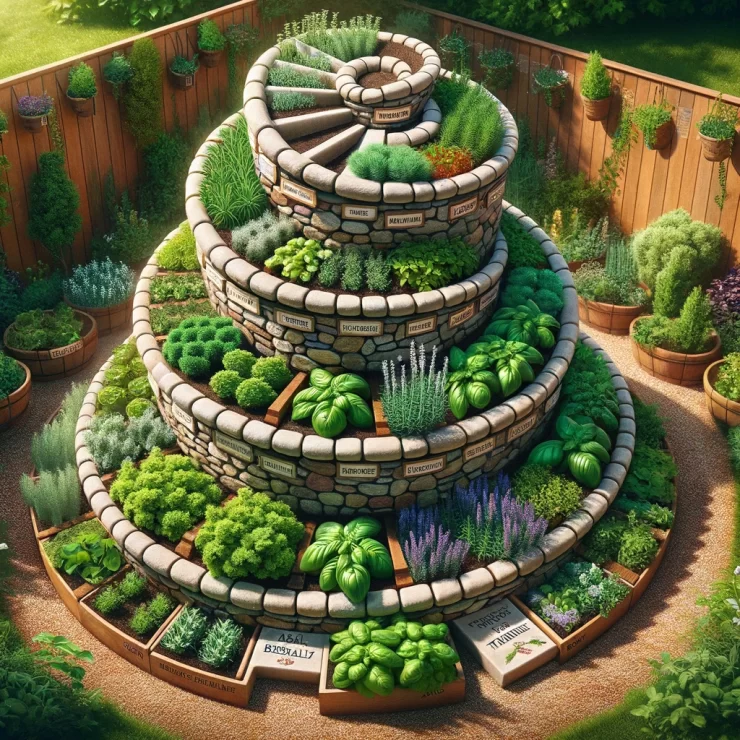
If you’re an herb enthusiast or someone who loves to add fresh flavors to your cooking, a spiral herb garden is an excellent addition to your home. Not only does it provide a beautiful and visually appealing feature in your garden, but it also allows you to grow a variety of herbs in a small space efficiently. In this article, we’ll guide you through the steps to create your own spiral herb garden, so you can enjoy a bountiful harvest of herbs year-round.
Step 1: Choose the Right Location
The first step in creating your spiral herb garden is selecting the perfect location. Herb gardens thrive in areas with plenty of sunlight, so choose a spot that receives at least 6-8 hours of direct sunlight each day. Ensure the location is easily accessible and close to your kitchen, so you can easily harvest herbs for your culinary adventures.
Step 2: Gather Your Materials
Before you begin constructing your spiral herb garden, gather all the necessary materials. You’ll need:
Bricks, stones, or other suitable materials for building the spiral structure.
A shovel for digging the garden bed.
Good quality potting soil.
A variety of herb plants or seeds.
Mulch for retaining moisture and preventing weeds.
Gardening tools like a trowel, gloves, and a watering can or hose.
Step 3: Build the Spiral Structure
Start by marking the center point of your spiral garden bed. Then, lay out the first layer of bricks or stones around this center point in a spiral pattern. Gradually build upward, stacking the materials to create a spiral shape. You can make the spiral as large or small as you like, but generally, a diameter of 4-6 feet works well for most gardens.
Ensure that each layer is stable and level before moving on to the next one. The height of the spiral will depend on the number of layers you want and the available space.
Step 4: Prepare the Soil
With the spiral structure in place, it’s time to prepare the soil. Use your shovel to dig out the garden bed within the spiral. Remove any weeds or debris from the area and loosen the soil to a depth of at least 6-8 inches. Mix in compost or well-rotted manure to enrich the soil, providing essential nutrients for your herbs.
Step 5: Plant Your Herbs
Now comes the fun part – planting your herbs! Select a variety of your favorite herbs, such as basil, oregano, thyme, parsley, mint, and rosemary. Arrange them in the spiral garden based on their growth habits and sun requirements. Taller herbs should go on the outer edges of the spiral, while smaller ones can be planted closer to the center.
Dig holes for each herb, place them at the appropriate depth, and gently pat down the soil around them. Water the newly planted herbs thoroughly.
Step 6: Add Mulch and Maintain
To conserve moisture, suppress weeds, and create a neat appearance, add a layer of mulch to your spiral herb garden. Wood chips, straw, or leaves work well for this purpose. Mulching also helps regulate the soil temperature, which is beneficial for the herbs.
To ensure your spiral herb garden thrives, remember to:
Water regularly, keeping the soil consistently moist but not waterlogged.
Fertilize your herbs with a balanced organic fertilizer every 4-6 weeks during the growing season.
Prune and harvest your herbs regularly to encourage growth and maintain their shape.
Protect your herbs from pests by inspecting them regularly and using organic pest control methods when necessary.
Growing your own spiral herb garden is a rewarding and visually appealing way to have fresh herbs at your fingertips. With the right location, materials, and care, you can create a thriving herb garden that not only enhances your culinary adventures but also adds beauty to your outdoor space. So, roll up your sleeves, gather your materials, and start growing your own spiral herb garden today – your taste buds will thank you!


Add comment