Gardening enthusiasts often face the challenge of keeping their plants adequately watered, especially during hot summer months or when faced with time constraints. Traditional watering methods can be inefficient and labor-intensive. However, there’s a solution that not only conserves water but also reduces the need for constant attention: wicking beds with self-watering capabilities.
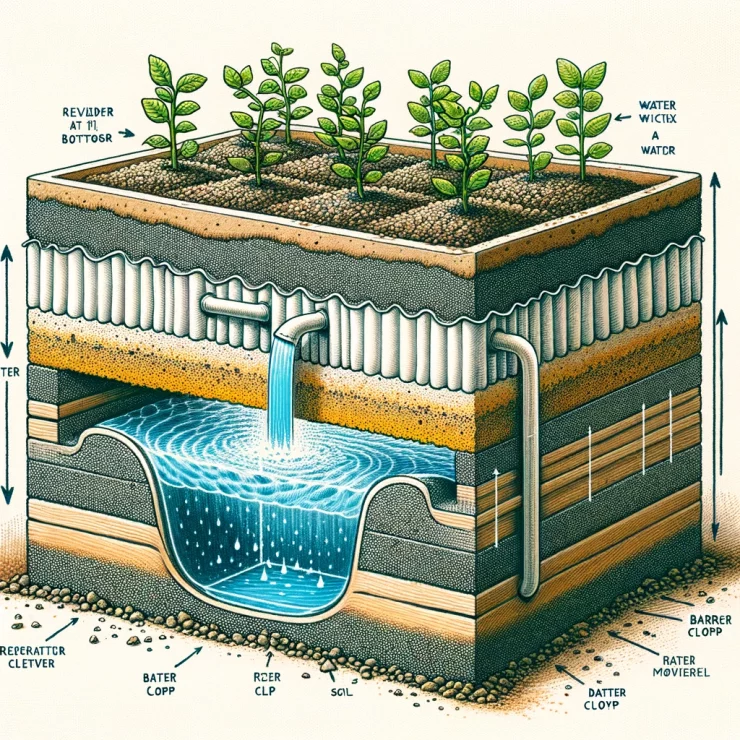
Wicking beds utilize a passive watering system that draws moisture up from a reservoir below the soil, ensuring plants receive a consistent water supply without excessive evaporation or runoff. By following a few simple steps, you can create your own wicking bed and enjoy healthier plants with minimal effort.
Materials Needed:
Container: Choose a suitable container for your wicking bed. This could be a raised garden bed, a large planter box, or any other watertight container with adequate depth.
Water Reservoir: You’ll need a reservoir to hold the water. This can be created using a waterproof liner or by partitioning off a section of the container. Materials such as pond liner or heavy-duty plastic sheeting work well for this purpose.
Wicking Material: Select a wicking material to draw water from the reservoir to the soil above. Options include geotextile fabric, old towels, or recycled plastic bottles with the bottoms cut off.
Growing Medium: Choose a high-quality potting mix or soil blend suitable for your plants. Avoid using garden soil, as it may compact and impede water flow.
Drainage Material: To prevent waterlogging in the soil, add a layer of coarse gravel or perlite at the bottom of the container.
Plants: Select plants suited to your climate and growing conditions. Consider the water requirements of each species when planning your garden layout.
Steps to Build:
Prepare the Container: If using a raised garden bed or planter box, ensure it is clean and free from any debris. Line the bottom of the container with the drainage material.
Create the Water Reservoir: Install the waterproof liner or partition off a section of the container to serve as the water reservoir. This should be located at the base of the container.
Install the Wicking Material: Place the chosen wicking material into the water reservoir, ensuring it extends up into the soil above. The wicking material should be in direct contact with both the water and the soil.
Fill with Growing Medium: Add the growing medium on top of the wicking material, filling the container to the desired level. Leave enough space for planting your chosen crops.
Plant Your Garden: Carefully plant your chosen vegetables, herbs, or flowers into the soil, ensuring they are well-spaced and adequately covered with growing medium.
Water the Reservoir: Fill the water reservoir with water until it is just below the level of the soil. The wicking material will draw moisture up into the root zone of the plants as needed.
Maintenance Tips:
Check the water level in the reservoir regularly, especially during hot weather or when plants are actively growing.
Top up the reservoir as needed to ensure a consistent water supply.
Monitor plant health and adjust watering frequency as necessary.
Mulch the soil surface to help retain moisture and reduce evaporation.
By following these simple steps, you can create a wicking bed with self-watering capabilities that will provide your plants with a reliable water supply and ensure healthy growth throughout the growing season. Enjoy the benefits of reduced water usage, improved plant health, and less maintenance effort in your garden.


Add comment