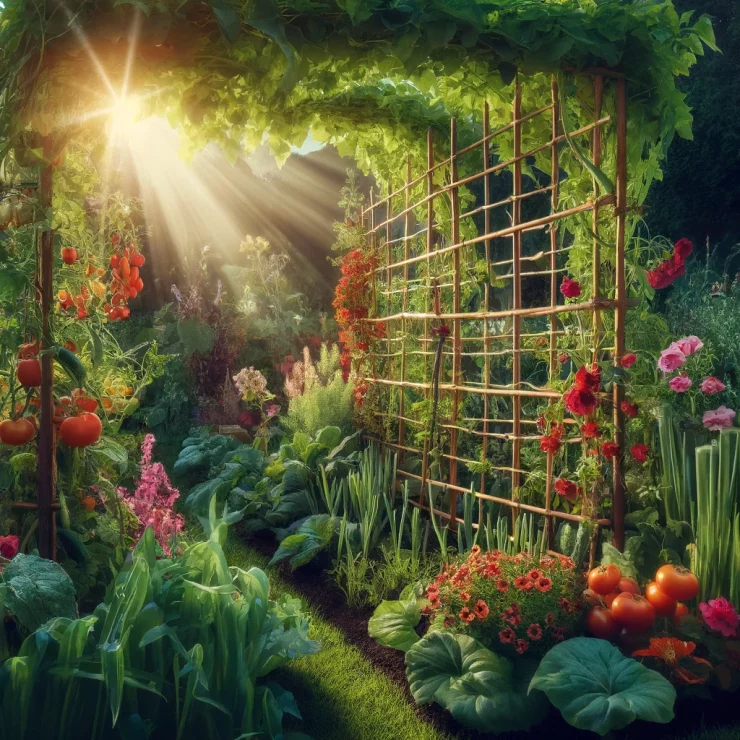
A flourishing garden is more than just a collection of plants; it’s a sanctuary, a place to unwind, and a source of pride for many homeowners. While nurturing a garden can be deeply rewarding, it often requires careful planning and thoughtful execution. One key element that can elevate both the productivity and aesthetics of your garden is a trellis. A well-designed trellis not only provides support for climbing plants but also adds visual interest and structure to your outdoor space. In this guide, we’ll explore how you can create a productive and beautiful garden with a simple do-it-yourself (DIY) trellis.
Why Use a Trellis?
Trellises serve multiple purposes in the garden. Firstly, they offer support for vining plants such as tomatoes, cucumbers, peas, and beans, allowing them to grow vertically and saving valuable ground space. By encouraging vertical growth, trellises also improve air circulation around plants, which can help prevent diseases and promote healthier growth. Additionally, trellises add vertical visual appeal to your garden, transforming it into a lush and inviting oasis.
Choosing the Right Design
When it comes to selecting a trellis design, the options are nearly limitless. From simple wooden structures to elaborate metal frameworks, there’s a style to suit every garden aesthetic. However, for those looking for an easy and cost-effective solution, a basic DIY trellis made from inexpensive materials such as wood or PVC pipe is an excellent choice.
Materials Needed
To create your DIY trellis, you’ll need the following materials:
Wooden stakes or PVC pipes
Garden twine or wire
Hammer or drill
Scissors
Vining plants (such as tomatoes or cucumbers)
Step-by-Step Guide
Choose Your Location: Select a sunny spot in your garden where you want to install the trellis. Ensure that it receives ample sunlight and has enough space for your vining plants to grow.
Prepare the Ground: Clear any debris or weeds from the area where you’ll be placing the trellis. Use a shovel or garden fork to loosen the soil and remove any rocks or obstacles.
Install the Support Structure: Depending on your chosen design, either hammer wooden stakes into the ground at regular intervals or insert PVC pipes into the soil. The spacing between stakes or pipes will depend on the size of your trellis and the type of plants you’ll be growing.
Attach the Crosspieces: Once the support structure is in place, attach horizontal crosspieces across the top of the stakes or pipes. These can be secured with screws, nails, or twine, depending on the material you’re using.
Create a Grid Pattern: Using garden twine or wire, weave a grid pattern between the vertical and horizontal supports to create a framework for your plants to climb. Ensure that the grid is spaced evenly to provide adequate support.
Plant Your Vines: Once the trellis is assembled, it’s time to plant your vining crops at the base of each support. Gently train the young plants to climb up the trellis as they grow, securing them with additional twine or clips if necessary.
Maintain and Monitor: Regularly monitor the growth of your plants and adjust the trellis as needed to provide adequate support. Water and fertilize your garden as necessary to promote healthy growth and productivity.
Benefits of DIY Trellises
Cost-Effective: DIY trellises can be constructed using inexpensive materials, making them a budget-friendly option for gardeners.
Customizable: You can tailor the design and size of your trellis to suit your garden layout and preferences.
Easy to Install: With basic tools and materials, DIY trellises are simple to assemble and install, even for novice gardeners.
Enhances Garden Aesthetics: A well-designed trellis adds visual interest and vertical dimension to your garden, transforming it into a lush and inviting space.
A DIY trellis is a simple yet effective way to create a productive and beautiful garden. By providing support for vining plants and adding visual appeal to your outdoor space, a well-designed trellis can enhance both the productivity and aesthetics of your garden. With just a few basic materials and some creativity, you can create a stunning garden oasis that you’ll enjoy for years to come.


Add comment