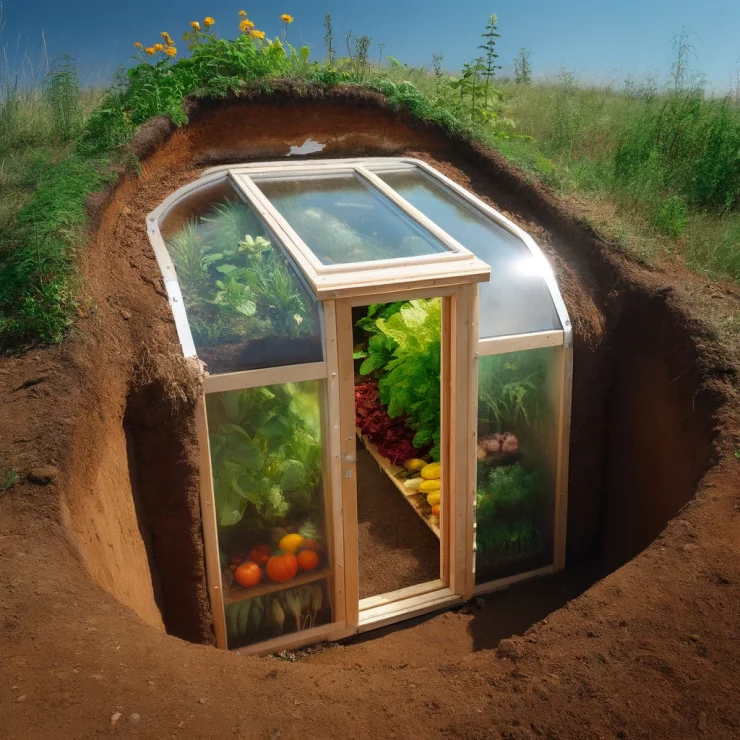
In today’s eco-conscious world, the allure of growing your own food year-round, regardless of the weather outside, is compelling. An earth-sheltered greenhouse, often referred to as a Walipini or pit greenhouse, offers a sustainable solution, leveraging the earth’s natural insulation to create a warm, stable environment for plants. Not only does this approach promise a bountiful harvest, but it also does so in a way that’s both eco-friendly and cost-effective. Here’s how to embark on building your own earth-sheltered greenhouse.
Step 1: Planning and Design
Location: Choose a south-facing location to maximize sunlight exposure. The site should have good drainage and be protected from strong winds.
Design: Most earth-sheltered greenhouses are built into a hillside or have earth mounded against their walls. A simple rectangular design is most efficient. Consider the size based on your needs and the landscape.
Permits: Check with local authorities to see if any permits are required.
Step 2: Excavation and Foundation
Excavation: Dig a hole to the desired depth and width. For most climates, a depth of 8-10 feet is sufficient to access the earth’s stable temperature.
Foundation: Pour a concrete footing or lay a foundation of mortared stone to prevent erosion and provide stability.
Step 3: Construction
Walls: Use natural or recycled materials for the walls. Earth bags, rammed earth, and straw bales are excellent for insulation and eco-friendliness.
Roof: A sloped, transparent roof made from polycarbonate panels or glass will allow sunlight to enter. Ensure the roof is angled towards the sun at the optimal degree for your latitude.
Insulation: Insulate the north, east, and west sides to retain heat. Sustainable options include straw bales or recycled foam panels.
Step 4: Interior Setup
Beds: Raised beds will prevent waterlogging and make it easier to manage plants. Use local soil amended with compost.
Irrigation: Install a drip irrigation system for water efficiency. Collecting rainwater is a sustainable option for watering plants.
Ventilation: Ensure there are vents or windows that can be opened to regulate temperature and humidity.
Step 5: Heating and Cooling
Passive Solar Heating: The greenhouse captures heat during the day. Thermal mass, like water barrels or stone, can store heat and release it slowly at night.
Geothermal Heating: Consider installing a ground-source heat pump for additional heating, drawing on the earth’s constant temperature.
Cooling: Shade cloths and strategic ventilation can help cool the greenhouse on hot days.
Step 6: Maintenance and Upkeep
Regularly check for pests and diseases.
Prune and trellis plants as needed.
Monitor temperature and humidity, adjusting ventilation and watering accordingly.
Building an earth-sheltered greenhouse is a rewarding project that aligns with sustainable living principles. It requires upfront effort and investment, but the payoff is substantial: a year-round growing environment that’s both eco-friendly and economical. By harnessing the earth’s natural resources, you can grow a diverse array of fruits, vegetables, and herbs, contributing to your household’s self-sufficiency and reducing your carbon footprint.


Add comment