

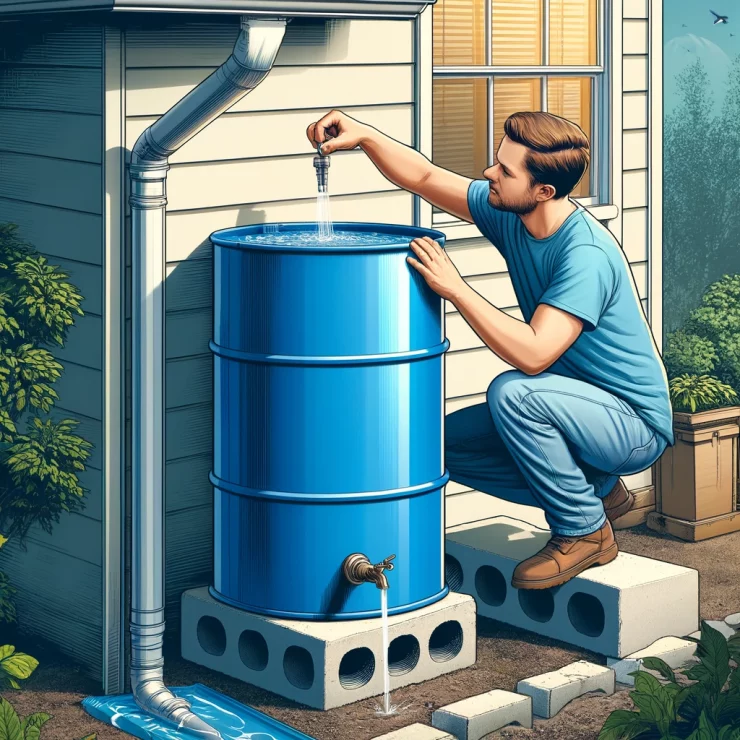
Collecting rainwater is a sustainable practice that not only conserves water but can also reduce your utility bills and provide your garden with a clean, chemical-free water source. Building a homemade rainwater barrel is an easy and effective way to start harvesting rainwater right in your backyard. Here’s a step-by-step guide to constructing your own rainwater barrel.
Materials Needed
A 55-gallon drum: Choose a food-grade plastic barrel, which is often available from food processors or distributors.
Fine mesh screen: To keep out debris and insects.
Spigot: For easy access to the water.
Downspout diverter or flexible downspout extension: To direct water from your gutter.
Hose clamp and other basic tools: Such as a drill, screws, and a hacksaw.
Silicone sealant: To ensure watertight connections.
Cinder blocks or a sturdy stand: To elevate the barrel for easier access to the spigot.
Step-by-Step Instructions
Step 1: Prepare the Barrel
Clean the drum thoroughly to remove any residues or contaminants if the barrel is not new.
Position the barrel near a downspout where it can easily collect water from your roof. Ensure the location is on a stable, flat surface.
Step 2: Install the Spigot
Determine the height of the spigot. It should be high enough to fit a watering can underneath but low enough to allow for good water pressure.
Drill a hole at the determined spot for the spigot. Make sure the hole is slightly smaller than the diameter of the spigot threading.
Coat the threading of the spigot with silicone sealant and insert it into the hole. Secure it from the inside with a washer and a locking nut to ensure a watertight seal.
Step 3: Create the Overflow Valve
Drill another hole near the top of the barrel for an overflow valve. This is important for managing excess water during heavy rains.
Attach a hose adaptor or another spigot as an overflow valve, sealing it with silicone to prevent leaks.
Step 4: Attach the Mesh Screen
Cut a hole in the lid of the barrel large enough to accommodate the water flow from the downspout.
Secure a piece of fine mesh screen over the hole to keep out leaves, insects, and other debris. You can attach the screen with waterproof adhesive or screws.
Step 5: Set up the Downspout
Use a downspout diverter or a flexible downspout extension to direct water from your gutter downspout into the barrel. Ensure it is securely attached to prevent dislodging during heavy rain.
Step 6: Elevate the Barrel
Place the barrel on a stand or cinder blocks to raise it off the ground. This elevation helps to utilize gravity for better water flow through the spigot.
Step 7: Maintenance
Check and clean the mesh screen regularly to keep it free from leaves and other debris.
Drain and clean the barrel periodically to prevent algae growth and sediment build-up.
Building a homemade rainwater barrel is a straightforward project that can greatly benefit your garden and the environment. By following these steps, you’ll be able to set up a functional rainwater harvesting system that can save you money and reduce your ecological footprint. Enjoy the rewards of your labor with a plentiful supply of rainwater for your gardening needs.

Add comment